Revit will make some great assumptions for you when you are
creating you model. One of the assumptions which may not meet you exacting
needs is the way Revit will automatically join the walls.
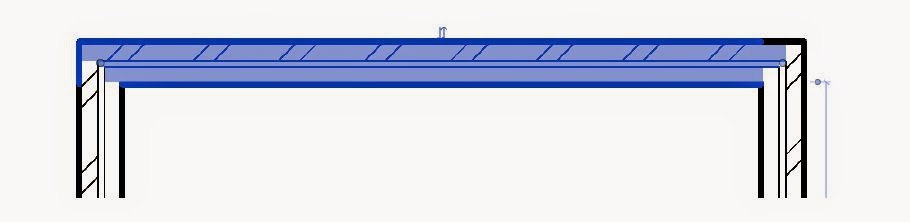
By default Revit will use a butt joint with the wall being
more dominant at its start point, and less dominant at its end. The wall joint
by display will automatically clean up the intersecting wall layers. You have
various options to adjust how the walls join.
To modify the way the walls intersect, select the
‘Wall Joins’ tool (in the Modify ribbon) and select over the intersection in
question.
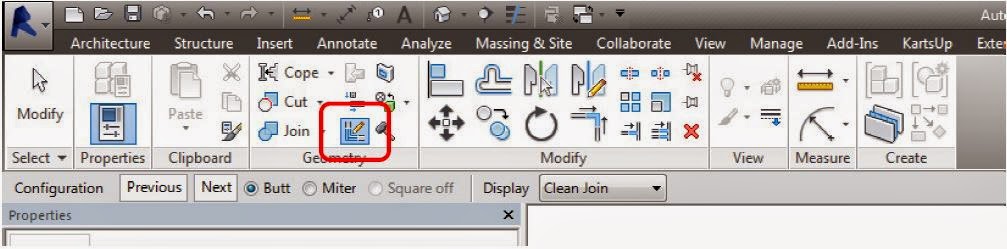
In the Options bar you can change the configuration of how
the wall intersects. The Previous / Next buttons adjust the Butt joint, the
Miter (Mitre) option is a great way of having all finishes meet up on the
corner, without any overlap, Square off allows you to join the walls at 90°no
matter what angle they intersect.
You can also Change how the Join is displayed and whether
you would like the join cleaned.
In the end, you don’t have to live with the Revit
assumptions.
One last tip with altering a walls join, think about how the
wall is joining in its entire height, the join at the bottom may not be the
same as it is at the top.
No comments:
Post a Comment